
Saturday 3 October 2015
Thursday 1 October 2015
Bits attached to bits
Bits have been attached to bits...
 And more bits attached to bits...

And more bits attached to bits.
 Visible progress! Giant mechano set - for the win!


And more bits attached to bits.

Tuesday 29 September 2015
Piers
All the steel piers have been cut to the right height. Next step - dyna-bolting them into place!

Friday 25 September 2015
Building a Rocket Stove
Why is building the house taking so long? What do we do when we
aren't building the house? Well, below is one answer. More answers
include - raking up dry leaves and grass to reduce bushfire risk,
raking up rocks and dirt to level out the clearing, researching the
next thing to build on the house, working online, working for the
dole, volunteering with the Rural Fire Service, going shopping and
all those other things that get in the way of life.


So what did I do today? Well, there have been a lot of articles on
Facebook lately about various different types of rocket stove, so if
you don't know what they are, they are basically a way of burning
wood for warmth and cooking which is meant to be quite fuel efficient
and also non-polluting. There is supposed to be something about the
shape which re-burns the smoke until it removes any toxins. Small
ones can be make from metal, but bigger ones are metal which is then
covered in clay cob. We would consider installing one in our house
except that they are REALLY heavy when built to full-size, and also
they are not suitable to put on wood floors (we are having
yellow-tongue/chipboard). We could possibly put one in a shed in the
future, but I also wanted to build one as a way to practice working
with clay, so that when I build my cob hut I will be more familiar
with the material.
I saw a particular video that caught my eye, which was small, made
of clay and about the right size to boil a kettle or fry some eggs. I
have some clay to spare on my property, so thought I would give it a
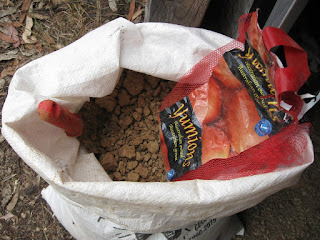
go. Here are my scribbled notes from the internet - you may notice by the end of this page that I didn't exactly follow them! Also comes with a bonus recipe...

A while ago I collected some clay that had been dug up previously, and mixed it with some water in buckets in an attempt to get the rocks to settle to the bottom and have the pure clay sitting on the top. This was the first of many things which I would have done differently if I knew! The big clumps of clay did not mix easily with the water and my attempts at stirring were in vain. I wished that I had broken the lumps down into smaller pieces first.

A while ago I collected some clay that had been dug up previously, and mixed it with some water in buckets in an attempt to get the rocks to settle to the bottom and have the pure clay sitting on the top. This was the first of many things which I would have done differently if I knew! The big clumps of clay did not mix easily with the water and my attempts at stirring were in vain. I wished that I had broken the lumps down into smaller pieces first.

Plan A worked so well in my mind, but in real life it was a
different story. It was a real struggle to get the clay back out of
the buckets, even after waiting a couple of weeks for them to dry. In
fact I accidently broke one of the buckets while I was struggling
with them. The theory about the rocks sinking to the bottom didn't
work especially well, so I decided to move onto plan B. I waited for
the clay to dry out some more, and then smashed it with a hammer into
little bits. This was time-consuming work, and I didn't do it for
very long each time as my hands got sore pretty quickly! Some of the
bigger pieces of clay didn't smash into little bits, but instead the
hammer just bounced off - as if it was a rubber ball. That meant it
needed more drying time! But finally I had almost a bucket full of
little bits of clay, and a day available to play with it. I read
online that I should then sieve the clay through a screen, but it
would have taken a ridiculously long time to get it all that small.

I mixed the clay with water until it was a fairly good consistency,
and let it sit for a hour or two to absorb the water.

Then I came
back and got the clay back out of the bucket (with great difficulty
and much groaning) and put it in the wheelbarrow with a bucket of
sand. We were very lucky when we bought the property that it came
with a pile of sand behind the shed, which looks like it was
left-over from building the tank stand. Since we don't have car it
can make it quite difficult to get our hands on things like these.
This was a ratio of almost 1 part clay to 1 part sand, and I read
that I should be going for 1 part of clay to 2 parts of sand.

Then I mixed it all together, with the help of a trowel, but mostly
with my hands (while wearing washing-up gloves). It felt like I was
making a giant batch of scones, as the best action to combine the
clay with the sand was a type of squeezing where my thumb rubbed
against my first two fingers to separate the bit of clay into smaller
pieces. I found the wheelbarrow was a very good size and shape for
mixing, although a little too low to the ground. I knelt on the the
ground a few times which gave my back a break from bending over.

Then I had a mixture which seems a bit too clayey, and I was still a
long way from my ratio of 1 part clay to 2 parts sand, so I added a
sprinkle more sand and mixed it through.

When I started making the
base of the rocket stove, I discovered that I really shouldn't have
done that, as it was so sandy that it was having trouble sticking
together. I picked out the most clayey bits and built with that, and
though it was a little too dry and crumbly, it seemed to be turning
out pretty good.

I wasn't sure what I was going to do to make the curve of the circle
go over the top with the clay mix, and I thought that perhaps I would
need to add some wire reinforcing to help it go all the way over
without collapsing. But I just kept adding bits to each side, making
sure that it stayed fairly thick, and it joined up remarkably easily.

Then I kept building up the sides of the back section. The most
time-consuming part was picking out the good clayey bits from the
mix, as I was testing each clod by squeezing it, and if it stuck to
my fingers then it was good enough to use. Eventually I got to the
point where I had no more good bits of clayey mix, and knew that if I
tried to finish the last bit of the stove with what I had, it was
just end up being weak and crumbly. I had to somehow add some more
clay to the mix but how exactly? I had already discovered that
working with wet clay was very difficult, and I didn't fancy having
to mix it all through with my hands all over again, so I came up with
a plan C. I grabbed a mesh orange bag, and trowelled some of my dry crushed
clay into it and sieved out the little bits of clay into a bucket.

When I had collected about a cup full, I sprinkled it over a corner
of my wheelbarrow mix, poured a little water over the top, and mixed
until it seemed about right, adding water a few times as I went. This
gave me a really lovely mix, which was much easier to work with than
my previous sandy mix. It was much easier to manipulate, to build
with, and to smooth down the edges nice and clean. I gave the whole
rocket stove a thin re-coat with the new mix, and found that it had
tiny black stones in it which gave quite a pretty finish. I was a bit
worried that the new mix wouldn't mesh with the old mix, and that
they would dry at different rates and crack, but didn't really have
any other choice. I finished off the top of the stove, and added some
handles for ease of moving, some holes at the top for air flow (poked
through with some metal pipe), some raised lumps at the top to rest
the saucepan on, and finally I added a little decorative flourish
with some pure clay right at the end.

I didn't realise how much personality my stove had until I was
looking at the photos - the holes at the top look like eyes, the
bottom opening looks like a mouth, the handles on the side look like
ears, and the decorative flourishes look like a moustache! The
finished stove is actually extremely heavy, and will be difficult to
move around. I built it onto a piece of metal which was lying around the property, for easy of moving around, and also to create a fireproof base. I built it on a bit of an angled base - a raised piece of corrugated iron - which was a great height to be working at, but hopefully it won't be a bit wonky when I try and use it on flat ground!

The most frustrating thing now is that we have to wait
at least a week for it to dry before we can start using it. I have
read that it is best to start with a couple of very small fires to
slowly dry it out and cure it, so that it doesn't crack. It's not the
kind of thing that you can decide to make and then use in the same
day!
I think that if I had my time over, I would do a few things
differently. I would try mixing the dry clay powder with the dry
sand, and THEN add some water. It would be a bit more tricky to work
out the right wetness, but some experimentation with adding more of
each would get there in the end. Also I would keep the ratio to less
than 1 part clay to 1 part sand, whatever the internet says! I know
that having more sand makes the clay less likely to shrink, but I did
need it to stick together. Perhaps having more water would have
helped? But then again, too much water will also lead to shrinkage
and possible cracking. I did not add any straw but it would probably
be helpful to hold the whole structure together. If this one crumbles
or breaks apart I might do that next time. I have also ready that cow
poo can be good to help water-proof clay cob, but decided not to
include it as I will be trying to keep it dry anyway, and it doesn't
seem a good combination with food cooking!
Altogether this took me about 3 to 4 hours to build the stove - not
including all of the prep time with collecting, drying and crushing
the clay. I finished shortly before a shower of rain - perfect timing! Josh says that if we build another one, we should shape it
like a dragon. I think it's a great idea - except he can do all the
work for that one! I will try to remember to let you guys know how this little stove goes when we get around to testing it!
Sunday 13 September 2015
More piers...
All of the piers for the perimeter of the house have now been cut, and are looking quite happily level. We ran out of metal for the rest, so went on a trip to Bunnings and gave them lots of money. We saved $20 though because we got one of their owner-builder cards which gives you a 5% discount on most items. We also bought some underfloor insulation, luckily it's the thin stuff like alfoil so that we didn't need several HUGE batts that wouldn't have fit in the car! Tomorrow Josh will be helping one of the locals with a build on their site, in return for some work done on our site.
 Yes one of the piers has fallen over! I collected some of the clay which was dug out of the footings holes this afternoon with the plans to make a little rocket stove to cook on. The Rural Fire Service has been asking us if we can go out to fight fires, but it's hard to find the time when we should be building a house! Also raked up some leaves near the shed to try and reduce the amount of 'fine fuel' in case of a bushfire here, it won't make much difference but hopefully it's better than nothing.

Thursday 10 September 2015
Found the cutting discs!
So Josh wanted me to catch the bus
to the shops to buy some cutting discs for the angle grinder so he
could begin cutting the metal piers to the right lengths. He thought
he already had some but couldn't find them in the shed. Hoping to
save myself a day trip, I got up early and started looking through
the shed in the vain hope they would be hiding somewhere in there. I
knew I could easily spend an hour rifling in, around and under boxes,
crates and cupboards - and still come up empty-handed - but it was
worth a try. About 2 minutes in I was looking in what I thought was a
silly spot and lo and behold! there was a pile of cutting discs! They
were very well hidden under a flat piece of wood so it wasn't
surprising that Josh didn't find them.

Most of the piers have now been
cut to size and we just need to buy one more length of steel in order
to finish this step. The nearest Bunnings wants $150 delivery fee so
we are hoping to rope a local into giving us a lift! We have also
been researching under-floor insulation as I thought it might be
easier to install BEFORE putting the yellow tongue down. The reality
is actually much more complicated. There are basically 2 types of
under-floor insulation - thin stuff which is like bubble-wrap covered
in alfoil, or thick stuff.
The thin stuff comes in long wide
lengths which you can simply lay over all your bearers and then put
your flooring on top, which sounds to me fairly easy. The thick stuff
comes in widths which are made to fit between your bearers, and then
need to be held in place. This stuff is mostly designed to be
installed after building, and all the instructions tell you to staple
or tack it to your wooden beams.
Well, we are working in metal so
what are we supposed to do then? Some of the companies are quite
lacking in information and do not reply to queries. Also, I need to
know about whether the insulation would be bush-fire proof, would be
vermin-proof, and whether the under-floor area needs to be enclosed?
And if so, can it be enclosed vertically around the perimeter of the
house, or does it need a whole seperate layer of 'floor boards'
attached to the underside? Sounds expensive!
Other things to take into account
are whether the insulation is healthy to live with after installation
(eg. fibres aggravating asthma or off-gassing of VOCs), whether the
production method is environmentally friendly, whether it will
degrade over time, and whether it is made locally. Oh and of course - price! Would love to talk
to someone who has done this before!
Tuesday 1 September 2015
Upward bound!
Yesterday I got home just before dark to discover that some upward progress has been made on building our house! It's a great feeling and very exciting.
 Apparently it was too much to set up the generator down at the house site so Josh just cut the 75mm steel piers with a half-blunt hacksaw. No wonder he was so exhausted when I got home! I took these photos in the early morning light before I headed out for the day again, leaving Josh all alone to build the house by himself! It might be more tricky without an assistant but I think he likes the peace to think things through.
Then today he discovered that he doesn't seem to have any cutting discs so couldn't have used the angle grinder to cut the metal anyway! Of course this was AFTER he lugged the generator down to the house site. Damn. Instead he made use of it by drilling in screws with a plug-in drill instead of a cord-less drill, and was very pleased by how much easier it made the whole procedure. 240V instead of 14.4V makes for a lot more grunt, handy when you are drilling tek-screws through several layers of metal.
So tomorrow I am off to catch the bus to the nearest town with a hardware store, to hopefully buy some cutting discs. He better give me good instructions about the right ones to buy, unlike the masonry hammer-drill bits!!!
Tuesday 25 August 2015
Ready to hammer-drill
Our concrete is curing well,
turning a very pale shade of white and starting to look like 'real'
concrete. Once we hit the 2 week mark this coming Thursday then it should be basically
finished curing, and we can start the next step. We need to
drill some holes in the concrete, for which we are going to use a
hammer-drill. In order to power the hammer-drill with electricity we will need to move
the generator down to the house site, which is about 100m, or get a
really long extension cord. Moving the generator will be tricky as it
is fairly large and heavy, but we have a four-wheel trolley which we
can use. Rolling it down the hill is certainly going to be easier
than pulling it back up! Keep in mind that we don't have a car to make things like this easier, basically we are like the Amish but without horses!
I have pulled out all the various bits and pieces
supplied by the kit-home company, and gone through them and tried to work out what we are
going to need first. The flooring is provided by a different company
so there are no written instructions, only some pictures which we
will hopefully be able to figure out what they mean. On top of the
concrete we will first place a chunky plastic rectangle, then on top
of that is a thick metal plate with uprights which the piers
themselves will be placed over.

A special kind of mechanical masonry anchor gets banged into the drilled holes, and then when the the nut is turned at the top, the upward pressure moves a particular part of it. This makes the part of the anchor that is at the bottom of the hole wider than the hole itself and so resists being pulled out. Sounds pretty clever to me!
On top of the piers goes another
heavy metal piece which has an adjustable screw. This means that if
we need to change the height of the piers at any time in the future
it should be quite easy. These screws are also good for preventing
termite infestation, as a quick under-the-house check at any time
after the house is built will let us know if any termites are
building tunnels up into the house, and measures can be taken against
them. This seems like much easier than the termite prevention that
is required for a concrete slab, which involves poison, special mesh,
great expense and harmful chemicals for humans and native habitats. Yet another reason why I am glad that we didn't get a concrete slab!
23 concrete supports with 2 holes
in each one = 46 holes which have to be hammer-drilled in exactly the
right place.
Friday 14 August 2015
More Concrete
We
spent a lot of time coming up with ideas of what we could do with the
extra concrete left-over from when we had the concrete truck come out
and pour our footings holes. If you don't use all of the concrete
that you order, then the concrete truck company charges a LOT of
money, because they have to somehow dispose of it – and before it
sets in the truck! So there were a lot of discussions of
possibilities, but nothing that we could really agree on as
definitely the best idea. We were both thinking that our own ideas
were obviously superior, and the other person's ideas were a bit
silly and unfeasible!So the afternoon before the truck came out we
took advantage of the last half an hour of sunlight to walk down to
the house site, and look around to decide what our best options were.
Then
Josh had the brilliant stroke of genius that we could grab the empty
tyres that were sitting on the property when we bought it, and fill
them with concrete. I think the previous owner was perhaps planning
on building an Earthship at some stage, and that's why they had
collected old tyres. I had seen a few other different uses for tyres
too, such as using them as the corner supports for sheds, as the
underneath base for a raised floor, or for heavy weights to use as a
land anchor.
So
we used the last of the afternoon light to roll the tyres down the
hill to the tank pad, as that is the only piece of ground which is
level near the house site. Early the next morning I shovelled some
sand into the wheelbarrow and wheeled it down to the tank pad, and
made a little sand pad for each tyre. This was so that it would
provide a roughly level base, and be easier to move after the
concrete had set. Meanwhile Josh was giving the footings holes a
final check to make sure they were ready for concrete, and building a
little rock retaining wall around one of the holes which was in a bit
of a hollow.

A
few more minutes before the truck was due, I rushed up to the shed
and grabbed some wood and some nails, and very quickly banged
together a formwork. Just in time too – I carried it down to the
house site just as the concrete truck was coming up the driveway.
Josh was directing the truck where to back over to the footings
holes, so I quickly jumped onto the other side of the house site and
started shovelling a vaguely level spot for my formwork to go. It was
at the spot where the stairs for the verandah will probably be going
up, so hopefully it will provide a nice base for them to attach to.
At the very least it will be a good spot to wipe our dirty feet
before climbing up to our wooden floor while building the framework
on our house!

Then
as the truck was moving over to this side of the house, I moved to a
different spot and started shovelling another vaguely level area. I
know what you are thinking – why didn't we do all of the prep work
BEFORE the concrete arrived? Well, first we couldn't agree on what
was the best plan of action, and then when it came to the crunch
suddenly we were busy doing lots of other work during the week.
That's the way life works sometimes!

Anyway,
by the time the truck had finished filling all the footings holes,
the step formwork, and the tyres, I had cleared a big enough area for
a little shed. The last of the concrete in the truck was poured into
the middle of this, and we roughly smoothed it out into a circular
shape. Then we got a length of wood and pushed it over the slab a few
times until it was about level.

I
am imagining this little slab to be the base of my cob hut that I am
planning to make. We have plenty of clay on site which was dug out of
the footings holes, so if I mix it with some sand and some hay or cow
poo, then I should be able to build some cob walls. I am planning to
embed the lower sections of wall with rocks, and the higher sections
of walls with beer bottles. I am not sure how I am going to make the
roof as yet, but I am open to suggestions! The rocks which I placed
around the perimeter of the slab do not actually provide any
structural function, but I went to all the trouble because I think it
looks pretty.
Overall
the truck was on-site for about an hour and a half, though it felt
like a lot less time since we were running around pretty busy and
crazy for all of that time! I spent a couple more hours doing some
smoothing of the concrete and cleaning up around the site afterwards,
so it was a pretty big day. Josh had to go back to his computer work
after the truck left, so it seems that there is no rest for the
wicked :P
Thursday 13 August 2015
Concrete
Yes - today the concrete truck came out, and filled our 'footings holes' full of lovely concrete. It hasn't rained for ages here, and so it was perfect timing as both the driveway and the holes were quite dry. All of our imagined fears and worries turned out to be unfounded, thankfully. The driver was a bit grumpy when he first arrived as he had been told to find the lot number instead of the Rural Area Number - which is a big difference out here in the country! Luckily he came around after he realised that everything was ok. We had no trouble with the truck getting over our dodgy grid, up our dodgy driveway, or backing down over our house site in order to reach all the holes. Then Josh directed the truck where to drive, and he and a neighbour who came over to help, controlled the concrete going into the holes. A bit of a swish with the special tool for the concrete chute, and a bit of levelling the concrete over the holes, and it was pretty much done. We did not need to add any reinforcing, we did not need to make sure the tops were perfectly level, and we did not need to put posts in the holes as they are going to be added later with dyna-bolts. Too easy!

We over-ordered on the concrete deliberately, just in case it would not be enough - due to the holes filling with water a few times since being dug, so the size of the holes altogether was a bit difficult to exactly calculate. We would have originally needed about 2.2 cubic metres, so then if we over-calculated the hole size a little it would have been about 2.8 cubic metres, which could be rounded up to 3 cubic metres. But then we thought we would just round it up to 4 cubic metres, as then it gave us the opportunity to use the extra concrete for the same delivery price. Then we had to come up with a contingency plan for what to do with the left-over concrete!
Our original idea of using it for the tank pad was poo-pooed by a couple of different people, who said we would be better off just having a sand base for the water tank. We had a few different ideas - some of which we came up with just before sunset the day before - and they all turned out to all be pretty damn good. I will update you with more info on these in a future chapter - stay tuned!
Wednesday 24 June 2015
Trees
No, we still have not made any progress on our building due to rain. Instead I will subject you to a rant about trees.
I have gone on quite a journey about what trees mean to me since
buying a block of land which is covered with them. I am more familiar
with species of exotic trees since I used to be a bush regenerator
and that involved me learning about 'weeds'. In comparison Australian
native trees are a bit trickier to accurately identify. It is usually
fairly easy to identify the genus, and I can mostly pick out a 'gum'
tree - only sometimes being caught out with the Tristanias, which
often look very similar to the gums.
For example, it is pretty easy
to spot an acacia tree, otherwise known as a wattle. But figuring out
which wattle it is exactly, is much more difficult, since there are
about 100 species in Australia alone. And telling the difference
between the different gum trees is also very difficult. I have had
people try to explain it to me in the past, but no-one couldn't come
up with a better explanation than 'it just LOOKS like a such-and-such
gum' - not very helpful!
So when I
looked at some Australian bush, I used to just go 'Ooh! Trees!' I
have since discovered - by asking various local people who have
visited our block - what most of the tree species here are. We
primarily have spotted gum, stringy-bark, iron-bark, and grey gum.
This is along with the acacias and casuarinas, and another tree known
as a brush-box (which used to be known as a Tristania but then got
re-classified. No wonder I get confused!). So then I progressed to
going 'Ooh! It's a such-and-such tree!' and congratulated myself on
learning identification skills.
When I asked
people for more information about these trees, I received a lot of
conflicting advice. The first person who identified the spotted gum
told me that the timber was 'shit' and not even very good for
firewood because it burns quite 'cold'. I was disappointed to hear
this since spotted gum is the dominant species on our block, and I
was hoping that we could make good use of the timber after the trees
had been cleared for the bushfire break around the house area.
I have
since learned that the spotted gum is actually a very good timber for
a lot of uses, which includes making fantastic electricity poles (due
to its habit of growing very straight with no side branches for a
significant height), making good fence posts, and making great timber
for internal use - such as for furniture and for lining the internal
walls of your house. The only thing that you do not want to do with
them - is put them untreated into the ground, as they are quite
susceptible to termites and wood borers. This we have seen for
ourselves in the shed rafters, which are pretty much eaten hollow
from the wood borers flying up, and the termites making mud tunnels
up there too.
On the other hand, the posts which were made from
stringy-bark are still completely solid. I have also
been advised that stringy-bark and iron-bark are very desirable
timbers, with very hard wood that is difficult to cut, but great to
use for lots of things. Apparently iron-bark can actually burn TOO
hot in a wood stove, so combining it with spotted gum sounds like a
perfect solution.
This education about species means that now when I
look at trees I see something completely different. I think 'Ooh that
tree would make good timber for such-and-such' instead. Of course I
cannot forget that these trees are at their highest value while alive
and growing, providing food for insects, animals and birds, shelter
for creatures, and oxygen for everyone.
But I do now
understand that old saying 'Tim-ber!' when a tree is felled - the
tree changes from being a living thing, to being something which
humans can chop up and use. I still feel immense happiness when
looking at trees, but now that happiness has some added details and
information.
Sunday 3 May 2015
New Life
Yes the heavy rain that was forecast came and deluged us. I tried an experiment by covering some of the footings holes with pieces of corrugated iron to try and reduce the amount of water that would go in the holes. When I went and checked it after a few inches of rain, it very obviously had not worked at all. It had gotten to the point where we really didn't care if it rained even more, because the holes were so full they were overflowing. The good news is that I found a frog happily living under one of the pieces of corrugated iron, quite pleased with the new pond that it had found itself. Whilst we are waiting for the weather to be suitable in order to make progress on building the house, the life that abounds here does not wait for anything.
 Within a couple of weeks of the trees being cleared, there were little seedlings everywhere. Acacia, grass, and more that I don't know. The willy-wagtails were being challenged for territory by the swallows, who were literally dive-bombing them with poos. We've seen a few different frogs around, and it's gotten to the point where we don't even run and grab the camera anymore. I saw three big kangaroos on the driveway the other morning, just passing through. I am slowly raking the dirt to create pathways and sort out the rocks, and the disadvantage of this is that I am killing some of these new seedlings. I am making sure that I take it slow so that I am not destroying too much at once. Meanwhile I have been busy mattocking little runnels for the water to run off and hopefully drain a bit quicker, to reduce the muddiness around the house site, the tank site and the driveway. It's certainly amazing how much water continues to run off the land even hours and days after the last shower of rain. If I manage to get myself organised, I might even be able to set up an official pond while all the water is still running.
Monday 27 April 2015
I said I would like some ponds...
There we were, with 23 lovely footings
holes ready to fill up with concrete - and the driveway seeming just
about ready for a big truck to come up it... thinking about ringing
the concrete company - and then it rained. Oh well, a little bit of
rain shouldn't matter too much. But it rained a good couple of
inches. Oh well, a couple of inches in the holes shouldn't matter too
much, we can just scoop it out and it will dry off in a few days.
Then I went down and had a look at the holes after all that rain.

The holes were significantly full
of water. Considering these holes were 60cm deep, that's a lot more
than a couple of inches at the bottom! I had carefully arranged piles
of soil around the uphill sides of the holes so that they would act
as swales to redirect the water runoff. I am not sure exactly what
went wrong, but it certainly didn't work the way I was hoping. Some
of the holes were so full they were practically overflowing, yet
other holes had only a tiny amount of water in the bottom. There was
no visible reason for the random water distribution. There is a good
chance that the water came from underground, in which case there is
nothing we can do.
So I tell my partner the bad news,
and we spend the entire day scooping out the water, and much worse -
the clay slurry mixed with rocks. I started the day with a flimsy
plastic scoop, but spent the rest of the time experimenting with
small buckets, big buckets, and metal bowls to try and find the best
tools for the job. There was also some intense mattocking action as I
created little gullies so the water tipped out of the top holes
didn't just run straight into the bottom holes.
I also had the genius idea to set
up the 30m garden hose so that it was syphoning the water down the
hill with pure gravity. First I tied some insect screening over the
head of the hose with a rubber band to act as a filter, so that the
hose didn't get blocked up with gunk and little rocks. Then I tied
the hose head with a piece of string to the handle of a small bucket,
and then put a rock into the bottom of the bucket.
Then I pushed the bucket down into
the bottom of the hole of water. This way the hose head remained near
the bottom of the hole, but not on top of the clay slurry at the
bottom of the hole. This kept the water going into the hose
relatively clean, though I still had to clean little rocks from off
the filter every so often. There was a surprisingly strong suction
current after the water got flowing! And when I sucked the water to
the bottom of the hose with my mouth to start off the syphoning
effect, the water actually tasted quite pleasant - not the mucky
muddy mess I was expecting.
Then when the hole was almost
empty of water, I made sure the bucket was full of water and the head
of the hose was kept submerged - and quickly transferred the hose to
the next hole full of water. I was very impressed with my handywork,
and the way that I could empty out one hole by hand at the same time
as another hole was emptying itself. It also came in handy for one of
the holes which kept refilling itself full of water - I guess that is
a good example of this underground water that comes from nowhere!
Now we have had another week of
dry weather, so it could be about time to pour the concrete again -
but of course heavy rain is forecast over the next few days. Before
we risk the big concrete truck getting bogged in our driveway, we
need to have a worst-case-scenario back-up plan of how we are going
to get the concrete up the driveway. I will have a bit more of an
attempt at redirecting water away from the holes when it rains, and
may even try and cover some of the holes and see if that helps. But
otherwise I think we are back to playing that waiting game we are
used to. Hopefully after having so much practise we should be really
good at it!
Tuesday 14 April 2015
Passed First Council Inspection
Today the council guy came out and had a quick look, measure and photograph of our footings holes and said yep, they are all fine. First we got up early and dragged our weary sore tired muscles down to the holes for some more tidying up of the bottoms of the holes, which was horribly painful. Not even time for a cup of coffee :(
But then I asked the council guy some questions - for example, is it ok if we move the greywater trench somewhere different to our official OSSM map, since the spot chosen by the 'expert' seems to be uphill from the house site. He said yes that's fine, just as long as we stay 50m away from the creek. I also asked about the various stages for the future inspections, and we aren't due for the next inspection until we have put up all the framework. This can include putting up the external cladding and the roof panels, just as long as the inspector can see the frames from the inside.
There is also a stormwater inspection which we have pre-paid over $100 for, even though we don't have stormwater pipes here. The council guy admitted that it is only relevant for town allotments that actually flow into stormwater drains, but still said that they would do the stormwater inspection at a later date. I will keep that one up my sleeve for when I am next in the mood to be arguing with the council!
Here's a pic of the warning sticker on the digger that made our footings holes.

We are now free to fill our holes with concrete - just have to wait for them to dry out a little more, and for the driveway to harden up a little more. We have plenty to keep us busy in the meantime, with over an acre of dirt that needs to have the rocks picked out of it...
But then I asked the council guy some questions - for example, is it ok if we move the greywater trench somewhere different to our official OSSM map, since the spot chosen by the 'expert' seems to be uphill from the house site. He said yes that's fine, just as long as we stay 50m away from the creek. I also asked about the various stages for the future inspections, and we aren't due for the next inspection until we have put up all the framework. This can include putting up the external cladding and the roof panels, just as long as the inspector can see the frames from the inside.
There is also a stormwater inspection which we have pre-paid over $100 for, even though we don't have stormwater pipes here. The council guy admitted that it is only relevant for town allotments that actually flow into stormwater drains, but still said that they would do the stormwater inspection at a later date. I will keep that one up my sleeve for when I am next in the mood to be arguing with the council!
Here's a pic of the warning sticker on the digger that made our footings holes.
We are now free to fill our holes with concrete - just have to wait for them to dry out a little more, and for the driveway to harden up a little more. We have plenty to keep us busy in the meantime, with over an acre of dirt that needs to have the rocks picked out of it...
Monday 13 April 2015
Bull Ants are Bullies
The destruction of the bull-ant nest which is right next to the house site seems to be going well, if not complete. After pouring all that boiling water down there the other day, a day or two later I saw a couple of bull-ants carrying larvae uphill to what must presumably be another nest. I tried to follow them to find where they were going but kept losing them. I tried a new strategy of killing all the bull-ants individually which I found roaming around - which is quite a tricky feat in itself. You can't squish them under your boot because they just emerge from the dirt and keep going. You have to basically crunch them between two rocks, and if you chop them in half, the front half keeps walking around and trying to attack you. Very much like the Terminator. The next step was to disturb the nest and kill all the ants which came out, and when they stopped - to disturb the nest some more. Eventually I ended up digging about 10cm down into the dirt and discovering a whole bunch of larvae.
 I couldn't actually find any kind of head or mouth on these things, so not exactly sure how they feed in order to grow bigger. I felt bad that I was destroying the ant nest when they were just trying to live their ant lives - but they are so aggressive! And when they bite it really hurts! So I thought I had destroyed the nest because I couldn't find any more ants, but today there are still more ants appearing from the same spot when I disturbed it. They seem a little less aggressive these days, but I still want to remove this nest completely because it is so close to the house site. We don't want to be bitten every day while building!
Today we cleaned out the bottom of our footings holes, which was quite a tricky task - some of the holes had roots sticking out, some of them still had wet sticky heavy clay, and all of them were difficult to access. Lots of swearing was necessary to get the job done. Just a little more work tomorrow morning before the council guy is due to come and inspect. Fingers crossed it goes well and we don't have some kind of spanner thrown in our works.
Today we cleaned out the bottom of our footings holes, which was quite a tricky task - some of the holes had roots sticking out, some of them still had wet sticky heavy clay, and all of them were difficult to access. Lots of swearing was necessary to get the job done. Just a little more work tomorrow morning before the council guy is due to come and inspect. Fingers crossed it goes well and we don't have some kind of spanner thrown in our works.
Saturday 11 April 2015
Small jobs take ages by hand!
Before we can get the concrete poured into the footings holes, we need to clean out the loose dirt from the bottom of the holes. Before we can do that, I have been pulling back the mounds of dirt around the holes so it doesn't just fall straight back in again. A few hours hard work today, and the 'clearing the dirt' part is only half done. This is gonna take a while!
 It's a tricky job, trying to get clumps of dirt and rocks from the bottom of a deep hole. The long-handled shovel wasn't very useful, the campshovel is the right angle but the handle is too short, and the hole is too small to stand it. I tried a small bucket and one foot in the hole and the camp shovel - best combination so far but still tricky and time consuming!
We will have to make sure it is done before the council guy comes to inspect on Tuesday. And since council regulations say that you can't work on Sundays (forcing everyone to follow Christianity) that leaves Monday to be a very busy back-breaking day!
We will have to make sure it is done before the council guy comes to inspect on Tuesday. And since council regulations say that you can't work on Sundays (forcing everyone to follow Christianity) that leaves Monday to be a very busy back-breaking day!
Thursday 9 April 2015
New Life
It has been amazing how quickly the messy clearing with its lumpy dirt and rocks has renewed itself with new life. Grass has been popping up almost everywhere, and baby acacia trees too. There would be a massive seed bank of lomandra, casuarina, and tea tree - along with the various varieties of eucalypt - just sitting in the soil waiting for an opportunity. In fact I was thinking that I should dig some lines with the pointy side of our mattock out at the front of our land - the part where the trees haven't been cleared - and get some acacias growing out there for extra privacy. They love growing in open disturbed places and it seems like the perfect opportunity.
The lone banksia tree on our place which we specifically saved from the clearing has rewarded our thoughtfulness with a burst of flowers. Suddenly the tree is getting light that it never had before, and I hope this is a sign that the tree is much happier now. Otherwise it could mean that the tree is about to die and wants to flower one more time before then! The birds, insects and glider possums will be very happy to have a feed of delicious nectar.
 Some of the animals seem to like the new habitat too - there are a couple of Willy Wagtails who have claimed it as their territory. They spend all day flying across the dirt and perching on sticks, waggling their tails and chasing insects. When the Yellow-tufted Honey-eaters come too close the Wagtails chide them, letting them know that the area has already been claimed.
The microbat also seems to enjoy flying along the open edges of the clearing at dusk, having a clear path to chase insects instead of having to avoid trees while flying! I like to imagine the bandicoot has had a bit of a wander down there too, checking out all the disturbed grubs making for an easy dinner. The bull-ants also seem to be having a lovely time, biting us when we stand too close to their nests. I am trying the method of pouring boiling water down the nest right next to the house site, but it is not completely successful yet. Any suggestions about how to safely remove such aggressive monsters?
The lone banksia tree on our place which we specifically saved from the clearing has rewarded our thoughtfulness with a burst of flowers. Suddenly the tree is getting light that it never had before, and I hope this is a sign that the tree is much happier now. Otherwise it could mean that the tree is about to die and wants to flower one more time before then! The birds, insects and glider possums will be very happy to have a feed of delicious nectar.
The microbat also seems to enjoy flying along the open edges of the clearing at dusk, having a clear path to chase insects instead of having to avoid trees while flying! I like to imagine the bandicoot has had a bit of a wander down there too, checking out all the disturbed grubs making for an easy dinner. The bull-ants also seem to be having a lovely time, biting us when we stand too close to their nests. I am trying the method of pouring boiling water down the nest right next to the house site, but it is not completely successful yet. Any suggestions about how to safely remove such aggressive monsters?
Footing Holes Dug
Well the good news is that the footings holes are dug, a pretty easy job and hardly any rocks encountered. The bad news is that the truck completely destroyed our new driveway when it arrived. The guy did his best to fix it with his little digging machine, and it wasn't exactly his fault because there were a couple of dodgy bits of driveway which had hidden trapped compartments of water. This was due to the hole left from the felled tree, the clay under the road base, and the swale failing to keep water from running all the way down. Anyway eventually the truck was positioned so that it could unload the digger and roll up to the house site to dig the footings.
 Josh was a fantastic assistant who carefully positioned the auger onto each marked spot, pulled rocks out of the way and picked bits of root stuck on the end of the auger off. It was a lovely sound hearing the auger hitting those rocks and just digging right past them, much easier than trying to do it by hand! The last two holes were a bit tricky as they had a lot more rocks, and ended up being a lot wider than they needed to be, in order just to get past those rocks to get sufficient depth. We didn't need the rock breaker or anything so that was a relief.

So now we have 4 rows of 5 holes with an extra 3 at the western end for the verandah, each hole 60cm deep and 45cm wide. Then we got the guy to dig a bit of a pad at the eastern end for the tank to sit - I was thinking that we could pour extra concrete there but apparently it would be better if it was just sand for the tank base. A bit more research before the tank is delivered and we will work it out exactly what we are going to do for that. Now we will have to figure out something else for a place to put the extra leftover concrete - a little shed slab maybe?
There was even time to ring the council at the end of the day, and schedule them to come and check the footings, which should be early next week sometime. Meanwhile we just need to tidy up the holes by hand and dig out the last little bits of dirt and rock. Then comes the tricky part - waiting until the driveway seems like it will be ok for a big heavy cement truck to drive up it. And hoping that it doesn't rain.
Wednesday 8 April 2015
Official Construction due to start tomorrow.
Tomorrow we are due to have a fellow
come out to dig our footings holes for us. He has an auger attached
to a bobcat or backhoe or something, and some kind of rock breaker as
well. Hopefully it will be enough to get through the infamous rocks
around here. We have a mixture of smallish rocks up to rockmelon size
which aren't too hard to dig out, bigger rocks - beachball size and
bigger - which are almost impossible to dig out, and rock shelves
which are only a relatively short distance under everything else.
There is a great variety in the types
of rocks that we have dug up here, some are light blue speckles, some
are dark purple-black sparkles, some are delicate white and yellow,
some are shades of orange and red, and the rock shelf itself is
sandstone. All are amazingly beautiful, especially when you crack one
open and it reveals layers of different colours - usually a dark
centre surrounded by light blue speckles and rounded with orange and
red. Sometimes when digging and the metal blade hits the rock quite
hard - it gives off a smell like gunpowder. Other times it gives off
a shower of sparks.
We know that the rocks are not
something annoying that gets in the way, but instead are a great
resource which provides us with free material to build with - garden
walls, retaining walls, maybe even shed walls in the future. At the
moment I have been putting the rocks around some of the little plants
which survived the clearing - such as tea-tree and lomandra - and
they instantly look like absolutely beautiful little gardens. It is
great to have a little taste of how great the site will look in the
future - after a lot of hard work!
So we have been busy trying to get the
house site prepared and ready for the digging guy to do his thing. He
says the job should only take a couple of hours if all goes well. In
orded to get the house site cleaned up first we had to pick up all
the random branches and rocks lying around on the surface, then rake
all the lumpy dirt piles and hollows leftover from the excavator
clearing the trees. Suddenly the small floor area of the house of 70
square metres seemed like a large area when having to do all this
work! Then we put up some lines pegs and tied string lines to mark
out the external dimensions of the house site, followed by measuring
out where the holes need to go exactly and marking these spots with
sticks and yellow spray paint.

After we have had the holes dug, we
need to contact the council to come out and inspect the footings.
They say they need 48 hours notice, so that would make it early next
week sometime at the soonest. My neighbour says that when he built
his house, he just sent them some photos of the holes with a board
across it and a tape measure down it. Perhaps the council will be
okay with that - we will see.
And then after the council approves
the holes, we need to ring the concrete people to bring out the truck
to fill the holes. I don't think they need more than a day or two
notice, but we will see what happens when it comes to the crunch. And
of course during this week or so after the holes have been dug, we
will be hoping that it doesn't rain. We can plan to cover the holes
with tarps and corrugated iron and see how effective that is at
keeping water out of them! Also if it rains then our driveway will
get muddy and slippery again, which makes it difficult for vehicle
access - especially big concrete trucks! There was not a cloud in the
sky all day today, we'll see how auspicious that turns out to be...
Saturday 21 March 2015
Clearing Finished!
This morning it threatened rain which would have stymied the finishing of our tree clearing for possibly weeks, but held off with nothing more than a misting sprinkle and now it is all finished. The cloud cover was a lovely cool blessing after the last few days being unpleasantly stinking hot. We also got the boys to put a swale above the house site so that water running down the hill will not fill up the holes for the footings once they have been dug. This afternoon - after the excavator was loaded back onto the truck and safely driven away - the rain began in earnest and it has been very heavy for a few hours now. So I guess that means the swale is being given a good test!
We have some many piles of trees that it creates a tall unbroken wall for about 100 metres, it could almost work as a fence for stock if we blocked off the gaps. Except for goats, who would just have a ball jumping them!
 We decided not to dig the greywater trench yet, as the spot where the report told us to put it is actually UPHILL of the house site. I don't know much about plumbing, but I am pretty sure that would be a bad thing. We will leave that to worry about that at some later stage.
Next task is to tidy up the ground - pick out all the rocks, pick up the random sticks, rake out the dirt so that it is roughly level, and spread some mulch and native grass and lomandra seeds. This is gonna take a while since it is such a large area! I was also thinking that it would be nice to have to slope vaguely terraced, with rock walls between each level. That's also something for later after we have built the house I think.
It is almost time to start planting fruit trees, but I think we should wait until we have a pump which we can use to pump water up from the creek to water the fruit trees. Also it's only a small creek so in the dry season there will be very little water available. Don't want the poor things to die!
We have some many piles of trees that it creates a tall unbroken wall for about 100 metres, it could almost work as a fence for stock if we blocked off the gaps. Except for goats, who would just have a ball jumping them!
Next task is to tidy up the ground - pick out all the rocks, pick up the random sticks, rake out the dirt so that it is roughly level, and spread some mulch and native grass and lomandra seeds. This is gonna take a while since it is such a large area! I was also thinking that it would be nice to have to slope vaguely terraced, with rock walls between each level. That's also something for later after we have built the house I think.
It is almost time to start planting fruit trees, but I think we should wait until we have a pump which we can use to pump water up from the creek to water the fruit trees. Also it's only a small creek so in the dry season there will be very little water available. Don't want the poor things to die!
Friday 20 March 2015
Trees are down.
Today the man came and hopped into the excavator and knocked down a lot of trees. Most of the trees. He only had to stop cos it was the end of the day! Now we have a big area of disturbed dirt and several big piles of fallen trees. Our driveway was also repaired and loaded up with road base, hopefully now it will be accessible to those people who don't have 4WDs!
 There should be just one more day's work in it, clearing the rest of the trees, finished the driveway, creating a swale above the house-site, and probably digging the greywater trench. If we can figure out where it should go!
Monday 16 March 2015
Something happened!
Not much has happened, but at least it's better than nothing. Finally our bulldozer arrived to clear the trees - only it's not a bulldozer, it's an excavator. They decided that since the phone lines run through the area to be cleared, that an excavator would be more suitable for the job. We could have gotten an excavator out here more than 6 months ago but were told by many people, who seemed to know what they were talking about, that a bulldozer would be much better. Oh well.

After repeated "We'll be there tomorrow"s they finally turned up only an hour late, and unloaded the excavator off the truck and drove it up the driveway. Gosh it was a tight fight through the gate and I thought they were going to have to buy us a new gate for a few seconds there.
Then they had to go off for a meeting and won't be back to tomorrow. So it's not much progress, but at least they now have a vested interest in coming back - we can hold their excavator for ransom!
Sunday 8 February 2015
No Change on the Block Yet...
Still Waiting...
Nothing has actually happened since
the last blog entry, but we on the verge of something happening so I
will write about that instead. We have had a couple of bulldozer
operators come out to chat about clearing our trees, after waiting
months for someone to
a) advertise other than word of mouth,
with their actual phone number
b) answer their phone, at all, ever
c) actually come out when they say they
will come out
d) give us a quote less than $10,000
(yes that is TEN THOUSAND DOLLARS)
They both said it would be a fairly
easy job which could be done in one day. It's hard to imagine so many trees being knocked down in such a short time, but I
guess I will be seeing it with my own eyes eventually. We have
complicated things a bit with wanting the front of the driveway fixed
as well, so that will most likely turn it into a two-day job. The
most annoying thing about these guys is that they tried to convince
us to move the house site somewhere else. We said that we don't
actually have a choice about where to put the house due to having to
be
a) 50m from the creek
b) not clearing 20m from the creek
c) 33m from the boundary due to
bushfire restrictions
d) 50m from the road
and showed them the lines in which
were are restricted - but we still had to listen to a big monologue
about how he thought this other spot was a much better spot. Even
though it was RIGHT next to the boundary fence. I am getting sick of
saying the same thing over and over - I should just write it out and
hand them a written document! Besides the fact that it's all council
approved and too late to make any big changes now without paying more
money!!!
Then there was that hilarious confused 5 minutes
while the guy tried to process us telling him that we don't have a
car. We tried to move the conversation on but he was just standing
there, shaking his head and muttering. 'Don't have a car! .... ! ....
! ' We always tell them that we get around with 2 feet and a heartbeat, as it really is a lovely walk to the bus-stop or into town, with the trees and the cows and the birds. Anyway...
The first bulldozer guy said that he
wouldn't want to start any work until we had someone come out and find EXACTLY where the phone lines went through our property. If a
tree is knocked down within root boundary of the lines, they could
get pulled up and broken - and since everyone's phone lines further down the road goes
through our place, that's a pretty big problem. So we rang round a
couple of places and we were going to have to pay $400 - $500 - until one
friendly guy said that he was down at Coffs Harbour which was too far
to travel for a small job BUT he knew how we could get it done for free.
He said that if we ring Telstra and tell them that we are on a rural
property and haven't had a line survey done before, then Telstra
would pay the contractor for us. So we did and one week later, had
the line surveyor come out - for FREE!
He made the job look easy, clicked a
little machine onto the phone line and then walked around with
another little machine - probably somewhat like a metal detector - marking the lines with big dot of blue spraypaint every 5 - 10 metres
or so. He could even tell how deep they were and wrote that on the
ground with the spray paint as well. Somebody told me that the lines
would be maybe 1 and a half metres deep - well, these are as little as
40 cm deep and as much as 80 cm deep. There's a lot of rock around
here, and under that rock there is more rock - a big rock shelf. So
that did not surprise me.

That solved the problem of bulldozing
the trees - but created another problem. What do you think the
chances were of the phone lines going right through our house site?
Or of them going right through the EXACT MIDDLE of our house site? Well it
turns out that the chances were 100% because that's where the line
goes. I couldn't believe it, I thought it would be close, I thought
it would be very close, but I didn't think it would be straight
through the bloody middle.
So I think we are just going to have
to move the house site a few metres towards the road - that's one of
the good things about it being such a small house, it only means
about a 6 metre difference, and I am pretty sure the council won't
even notice. All our maps are pretty rough anyway - and we don't even
know exactly where the front boundary of our place is exactly. So
basically the phone lines are just a small problem.
Now we are back to playing the
'waiting for the bulldozer' game all over again.
Subscribe to:
Posts (Atom)