Why is building the house taking so long? What do we do when we
aren't building the house? Well, below is one answer. More answers
include - raking up dry leaves and grass to reduce bushfire risk,
raking up rocks and dirt to level out the clearing, researching the
next thing to build on the house, working online, working for the
dole, volunteering with the Rural Fire Service, going shopping and
all those other things that get in the way of life.
So what did I do today? Well, there have been a lot of articles on
Facebook lately about various different types of rocket stove, so if
you don't know what they are, they are basically a way of burning
wood for warmth and cooking which is meant to be quite fuel efficient
and also non-polluting. There is supposed to be something about the
shape which re-burns the smoke until it removes any toxins. Small
ones can be make from metal, but bigger ones are metal which is then
covered in clay cob. We would consider installing one in our house
except that they are REALLY heavy when built to full-size, and also
they are not suitable to put on wood floors (we are having
yellow-tongue/chipboard). We could possibly put one in a shed in the
future, but I also wanted to build one as a way to practice working
with clay, so that when I build my cob hut I will be more familiar
with the material.
I saw a particular video that caught my eye, which was small, made
of clay and about the right size to boil a kettle or fry some eggs. I
have some clay to spare on my property, so thought I would give it a
go. Here are my scribbled notes from the internet - you may notice by the end of this page that I didn't exactly follow them! Also comes with a bonus recipe...
A while ago I collected some clay that had been dug up
previously, and mixed it with some water in buckets in an attempt to
get the rocks to settle to the bottom and have the pure clay sitting
on the top. This was the first of many things which I would have done
differently if I knew! The big clumps of clay did not mix easily with
the water and my attempts at stirring were in vain. I wished that I
had broken the lumps down into smaller pieces first.

Plan A worked so well in my mind, but in real life it was a
different story. It was a real struggle to get the clay back out of
the buckets, even after waiting a couple of weeks for them to dry. In
fact I accidently broke one of the buckets while I was struggling
with them. The theory about the rocks sinking to the bottom didn't
work especially well, so I decided to move onto plan B. I waited for
the clay to dry out some more, and then smashed it with a hammer into
little bits. This was time-consuming work, and I didn't do it for
very long each time as my hands got sore pretty quickly! Some of the
bigger pieces of clay didn't smash into little bits, but instead the
hammer just bounced off - as if it was a rubber ball. That meant it
needed more drying time! But finally I had almost a bucket full of
little bits of clay, and a day available to play with it. I read
online that I should then sieve the clay through a screen, but it
would have taken a ridiculously long time to get it all that small.

I mixed the clay with water until it was a fairly good consistency,
and let it sit for a hour or two to absorb the water.
Then I came
back and got the clay back out of the bucket (with great difficulty
and much groaning) and put it in the wheelbarrow with a bucket of
sand. We were very lucky when we bought the property that it came
with a pile of sand behind the shed, which looks like it was
left-over from building the tank stand. Since we don't have car it
can make it quite difficult to get our hands on things like these.
This was a ratio of almost 1 part clay to 1 part sand, and I read
that I should be going for 1 part of clay to 2 parts of sand.

Then I mixed it all together, with the help of a trowel, but mostly
with my hands (while wearing washing-up gloves). It felt like I was
making a giant batch of scones, as the best action to combine the
clay with the sand was a type of squeezing where my thumb rubbed
against my first two fingers to separate the bit of clay into smaller
pieces. I found the wheelbarrow was a very good size and shape for
mixing, although a little too low to the ground. I knelt on the the
ground a few times which gave my back a break from bending over.
Then I had a mixture which seems a bit too clayey, and I was still a
long way from my ratio of 1 part clay to 2 parts sand, so I added a
sprinkle more sand and mixed it through.
When I started making the
base of the rocket stove, I discovered that I really shouldn't have
done that, as it was so sandy that it was having trouble sticking
together. I picked out the most clayey bits and built with that, and
though it was a little too dry and crumbly, it seemed to be turning
out pretty good.
I wasn't sure what I was going to do to make the curve of the circle
go over the top with the clay mix, and I thought that perhaps I would
need to add some wire reinforcing to help it go all the way over
without collapsing. But I just kept adding bits to each side, making
sure that it stayed fairly thick, and it joined up remarkably easily.

Then I kept building up the sides of the back section. The most
time-consuming part was picking out the good clayey bits from the
mix, as I was testing each clod by squeezing it, and if it stuck to
my fingers then it was good enough to use. Eventually I got to the
point where I had no more good bits of clayey mix, and knew that if I
tried to finish the last bit of the stove with what I had, it was
just end up being weak and crumbly. I had to somehow add some more
clay to the mix but how exactly? I had already discovered that
working with wet clay was very difficult, and I didn't fancy having
to mix it all through with my hands all over again, so I came up with
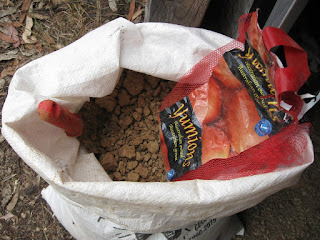
a plan C. I grabbed a mesh orange bag, and trowelled some of my dry crushed
clay into it and sieved out the little bits of clay into a bucket.
When I had collected about a cup full, I sprinkled it over a corner
of my wheelbarrow mix, poured a little water over the top, and mixed
until it seemed about right, adding water a few times as I went. This
gave me a really lovely mix, which was much easier to work with than
my previous sandy mix. It was much easier to manipulate, to build
with, and to smooth down the edges nice and clean. I gave the whole
rocket stove a thin re-coat with the new mix, and found that it had
tiny black stones in it which gave quite a pretty finish. I was a bit
worried that the new mix wouldn't mesh with the old mix, and that
they would dry at different rates and crack, but didn't really have
any other choice. I finished off the top of the stove, and added some
handles for ease of moving, some holes at the top for air flow (poked
through with some metal pipe), some raised lumps at the top to rest
the saucepan on, and finally I added a little decorative flourish
with some pure clay right at the end.

I didn't realise how much personality my stove had until I was
looking at the photos - the holes at the top look like eyes, the
bottom opening looks like a mouth, the handles on the side look like
ears, and the decorative flourishes look like a moustache! The
finished stove is actually extremely heavy, and will be difficult to
move around. I built it onto a piece of metal which was lying around the property, for easy of moving around, and also to create a fireproof base. I built it on a bit of an angled base - a raised piece of corrugated iron - which was a great height to be working at, but hopefully it won't be a bit wonky when I try and use it on flat ground!
The most frustrating thing now is that we have to wait
at least a week for it to dry before we can start using it. I have
read that it is best to start with a couple of very small fires to
slowly dry it out and cure it, so that it doesn't crack. It's not the
kind of thing that you can decide to make and then use in the same
day!
I think that if I had my time over, I would do a few things
differently. I would try mixing the dry clay powder with the dry
sand, and THEN add some water. It would be a bit more tricky to work
out the right wetness, but some experimentation with adding more of
each would get there in the end. Also I would keep the ratio to less
than 1 part clay to 1 part sand, whatever the internet says! I know
that having more sand makes the clay less likely to shrink, but I did
need it to stick together. Perhaps having more water would have
helped? But then again, too much water will also lead to shrinkage
and possible cracking. I did not add any straw but it would probably
be helpful to hold the whole structure together. If this one crumbles
or breaks apart I might do that next time. I have also ready that cow
poo can be good to help water-proof clay cob, but decided not to
include it as I will be trying to keep it dry anyway, and it doesn't
seem a good combination with food cooking!
Altogether this took me about 3 to 4 hours to build the stove - not
including all of the prep time with collecting, drying and crushing
the clay. I finished shortly before a shower of rain - perfect timing! Josh says that if we build another one, we should shape it
like a dragon. I think it's a great idea - except he can do all the
work for that one! I will try to remember to let you guys know how this little stove goes when we get around to testing it!


